How to Prevent Color Variation in Stained Wooden Products
Color variation in stained wooden products is one of the most common and most expensive sources of dispute between buyers and factories. Slightly different tones between batches can trigger claims, higher inspection rates, negative online reviews and rework costs. For importers, wholesalers, private label brands and Amazon sellers, controlling color variation is not only about aesthetics, but about brand consistency and predictable reorders.
As an OEM/ODM partner, Chic Homeware focuses on minimizing color differences from sampling through mass production and repeat orders. This article explains where color variation comes from, how to control it across acacia, pine, paulownia, bamboo, walnut, MDF veneer and plywood veneer, and what practical steps buyers can take to specify expectations clearly and protect their projects.

Why Color Variation Happens in Stained Wooden Products
Color variation rarely comes from a single reason. It is usually a combination of natural wood properties and factory process control. Understanding these factors helps sourcing managers ask the right questions and set realistic tolerances in advance.
1. Natural Differences Between Wood Species
Different materials absorb stain differently, even when using the same formula and process.
- Acacia: Dense, with dramatic grain and mixed tones in one board. Stain can look richer on the darker bands and slightly washed on lighter bands.
- Pine: Softer, with visible knots. Knots absorb stain differently from clean areas, and earlywood/latewood bands lead to striping if not handled correctly.
- Paulownia: Very light and porous. It takes stain quickly and can jump from light to dark if application is not carefully controlled.
- Bamboo: Technically a grass. It is often laminated; density varies between strips, affecting stain uptake and the final tone.
- Walnut: Naturally dark and rich. Color differences show more in the contrast between heartwood and sapwood.
- MDF veneer & plywood veneer: The veneer itself is natural wood, but the panel base is engineered. Veneer thickness and grain direction affect color after staining.
Buyers should expect some natural variation across species. The key is to control it so that the full shipment looks like one coherent collection, not a mix of unrelated colors.
2. Moisture Content and Wood Conditioning
Wood that is too wet or too dry will not absorb stain consistently. Moisture content affects:
- Penetration depth: Wet wood blocks penetration; stain may sit on the surface and look lighter.
- Drying time: Uneven moisture across panels can cause some pieces to dry darker and others lighter.
- Movement: Wood that continues to dry after staining can develop micro-cracks and color shifts around edges and joints.
Factory moisture control (air-drying, kiln-drying, warehouse conditions and pre-production acclimatization) is critical for color consistency, especially for export to dry or very humid climates.
3. Sanding and Surface Preparation
Sanding is one of the most underestimated sources of color difference. Two boards with different sanding grit or sanding direction will take stain differently.
- Too rough: Surface absorbs more stain, appearing darker and sometimes blotchy.
- Too smooth: Surface becomes slightly burnished, closing the pores, causing a lighter, more transparent finish.
- Inconsistent sanding: If one part of a product is sanded finer than another (for example, lid vs. body), they can look like different colors after staining, even if stained together.
For multi-part products like boxes, trays or tiered organizers, the factory must align sanding grits across parts to avoid visible tone differences.
4. Stain Formula and Application Method
Even small differences in stain formula and application will create visible color variation:
- Formula: Pigment vs. dye content, solvent ratio, and any added sealer or binder change the opacity and warmth of the color.
- Application: Spraying, brushing, wiping, dipping or rolling each produce slightly different effects.
- Thickness: Heavy spray or longer dip time makes the color stronger; a thinner coat looks lighter and more transparent.
- Wiping time: Leaving stain on the surface for 30 seconds vs. 2 minutes can change the final tone significantly.
Inconsistent equipment settings (gun pressure, nozzle size, conveyor speed) and unstandardized operation are common risks in mass production if not controlled with clear work instructions.
5. Topcoat, Sheen and Lighting
Even with identical stain, the topcoat and inspection environment influence perceived color:
- Matt vs. gloss: Glossy clear coats reflect more light, making colors appear deeper and more saturated.
- Number of coats: A heavier clear coat can slightly darken the product.
- Lighting: Warehouse cool-white light vs. warm retail light can shift the perceived color from neutral to yellowish or slightly grey.
For buyers selling online, subtle differences become more visible when customers compare multiple items side by side or leave product reviews with photos.

How to Control Color Variation Across Different Wooden Materials
Preventing color variation is about designing the right process around the chosen material. Below are practical controls that Chic Homeware uses for key materials frequently specified in B2B projects.
Acacia: Managing Strong Grain and Contrast
Acacia is attractive for high-end boxes, kitchen organizers and trays because of its rich natural grain. However, its variation must be managed carefully.
- Board selection: Group boards with similar grain intensity and base tone for the same product batch.
- Pre-toning or wash coat: For projects requiring a more uniform appearance, a light wash or sealer can reduce the difference between dark and light grain before the main stain.
- Sample-based grading: Agree on a grading range (for example, more natural vs. more uniform) during sampling. This becomes the reference for production.
Acacia is suitable for brands that accept some visible natural variation as part of their positioning, rather than demanding near-MDF uniformity.
Pine: Handling Knots and Soft Grain
Pine is often used for entry-level price points and rustic designs. It stains easily but is sensitive to knots and soft grain.
- Knot management: Decide whether knots are allowed, limited, or must be filled. This choice affects stain behavior and final tone.
- Pre-sealer for blotch control: A thin sealer layer or conditioner under the stain can reduce blotchy appearance in soft areas.
- Uniform sanding direction: Always sand with the grain and keep grit consistent across components, especially lids, bases and side panels.
For pine, managing expectations in advance is critical. If the buyer wants a very uniform color, MDF veneer may be a better base for stained finishes at similar price levels.
Paulownia: Lightweight but Highly Absorbent
Paulownia is popular for lightweight boxes and gift packaging where shipping cost is a concern. Its light color is good for stains, but it can over-absorb.
- Moisture stability: Because paulownia is light, moisture changes affect it quickly. Stable warehouse conditions and pre-production acclimatization are important.
- Controlled stain application: Spray and quick wipe-off are usually preferred over dipping to reduce deep penetration and patchy appearance.
- Test panels per batch: Paulownia can vary by source; each new material batch should be test-stained and compared against the master standard.
Bamboo: Laminated Structure, Consistent Look
Bamboo is widely used for kitchen organizers and trays because it is stable and has a modern look. Its laminated construction gives a generally consistent base.
- Strand direction matching: For visible surfaces, aligning bamboo strands directionally across panels helps keep color and pattern coherent.
- Fine sanding control: Over-sanding bamboo can burnish the surface, leading to lighter spots. Calibrating sanding grit is key.
- Clear vs. stained: Many bamboo projects use clear or slightly tinted finishes instead of heavy stain to better maintain uniformity.
Walnut: Respecting Natural Premium Character
Walnut is usually used for premium lines and needs careful color control to meet buyer expectations.
- Sapwood control: Clarify whether lighter sapwood is allowed on visible surfaces or must be minimized; this directly affects color uniformity.
- Mild stains: Many projects aim to enhance walnut’s natural tone rather than radically change it. Mild stains help keep variation within acceptable range.
- Consistent lot sourcing: Using walnut from consistent suppliers and logs reduces tone shifts between batches.
MDF Veneer and Plywood Veneer: Uniform Base, Natural Surface
For brands requiring more consistent tones across large orders, MDF veneer or plywood veneer is often the best compromise between natural look and uniformity.
- Veneer matching: Use similar grain pattern and tone veneers for each visible panel set, especially for lid-front-side combinations on boxes.
- Controlled veneer thickness: Veneer that is too thin can sand through; too thick can show more grain variation. Stable thickness helps standardize stain results.
- Standardized sanding and sealing: MDF and plywood absorb differently from solid wood. Establishing a specific sealer + stain system for veneer projects is essential.

Key Production Checkpoints to Prevent Color Variation
Beyond material selection, preventing color variation requires discipline at each production stage. Below are the main checkpoints Chic Homeware uses and that buyers can discuss in pre-production meetings.
1. Moisture Control Before Finishing
- Incoming material testing: Check moisture content of each wood batch and reject or recondition material outside the agreed range.
- Pre-assembly conditioning: Allow cut and machined parts to rest in the finishing workshop environment so they adapt before staining.
- Storage rules: Keep parts off the floor, away from direct sunlight or draft areas that cause uneven drying.
Buyers can request a brief note on moisture control steps in the pre-production documentation, especially for large-volume and long-term projects.
2. Sanding Consistency and Standards
- Defined grit sequence: For each product, fix a sanding sequence (for example, 180–240) and apply it across all parts.
- Cross-part control: For products like nested trays or compartment organizers, ensure the same sanding standard for all sizes in the set.
- Dedicated sanding jigs: Use jigs or tooling for edges and corners to reduce the risk of oversanding or undersanding in local areas.
From the buyer side, specifying “no visible color difference between lid and base due to sanding” as a quality requirement makes inspection criteria clearer.
3. Stain Preparation, Testing and Color Master Panels
- Master color samples: Develop a signed-off master panel on the same wood species and structure as the final product. This becomes the reference for production and future reorders.
- Batch-by-batch mixing: Stain should be mixed in defined ratios and filtered. Each batch is tested on a spare panel and compared with the master under controlled light.
- Clear labeling: Stain containers are labeled with formula name, mix date and usage scope to avoid accidental mixing of different formulas.
When buyers work with a Custom Wooden Products Manufacturer that is used to color-panel management, repeat order consistency becomes easier to maintain.
4. Controlled Application and Drying Conditions
- Standard operating procedures: Define spray pressure, gun distance, number of passes, wiping time and drying time in written SOPs.
- Operator training: Finishing operators should understand how small changes in pressure or wiping speed will affect color.
- Drying room conditions: Temperature, humidity and airflow must be stable; rapid or uneven drying can change final tone and sheen.
For large B2B orders, buyers may request early-stage production photos or videos specifically showing finishing lines and color checks.
5. In-Process Inspections and Color Grading
- First-article approval: At the start of mass production, several pieces are fully finished and compared to the master; this sets the benchmark for the shift.
- Lot-wise color checks: For each production lot, random samples are checked for color variation within the same lot and against the master.
- Grading and pairing: For boxed sets or multi-piece sets, parts are matched and packed together by tone so each consumer receives a visually coherent set.
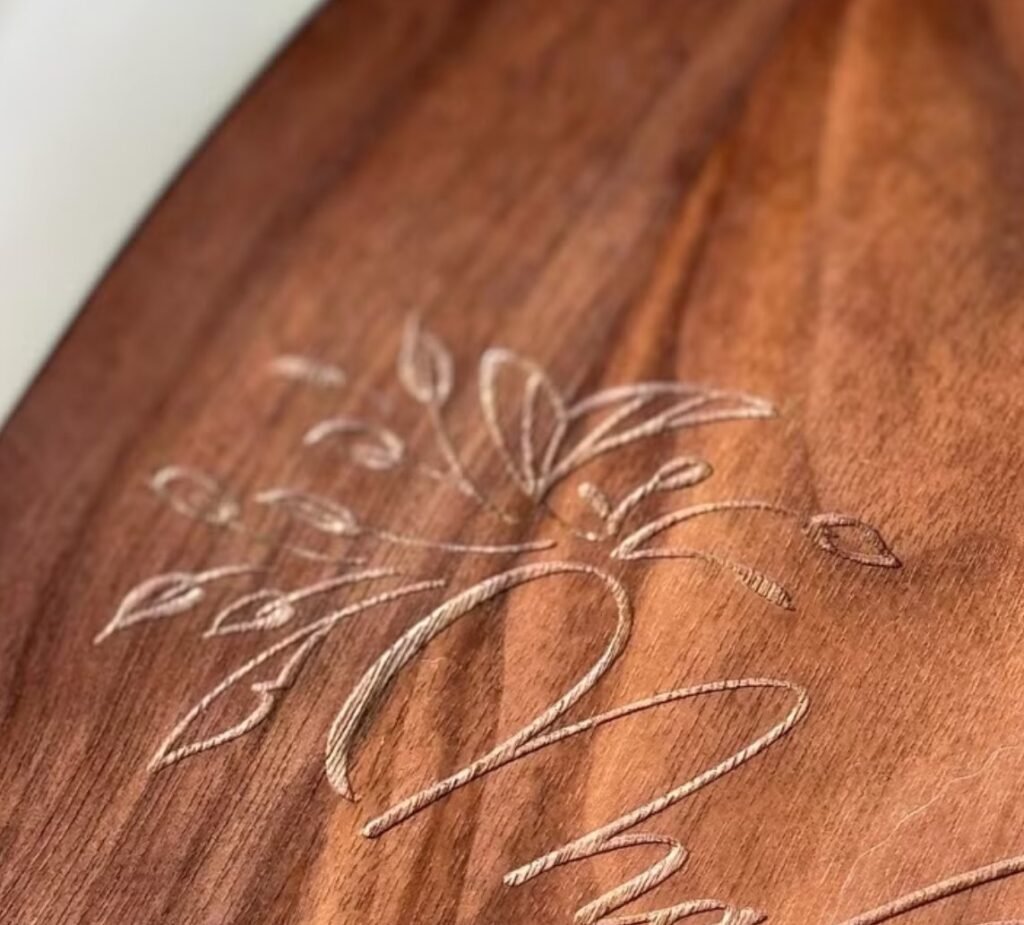
6. Logo Application and Color Interaction
Logos (laser, print, deboss, metal badge) can change the visual perception of color, especially on small items like jewelry boxes or tea boxes.
- Laser engraving: Darkens local areas. Testing on stained samples first avoids surprises like too-low contrast.
- Silk-screen or pad printing: Ink color should be tested on the final stained and top-coated surface, not on raw wood.
- Metal or acrylic logos: Reflective elements can make nearby areas look lighter; sampling should review logo and stain together.
Clear alignment on logo size, position, and interaction with stain color should be part of the sample approval process for OEM/ODM projects.
How to Communicate Color Requirements as a B2B Buyer
Many color issues originate from vague initial briefs. Sharper communication at the start reduces risk for both buyer and factory.
1. Use Clear Visual References
- Physical samples: Send existing products, color chips or furniture pieces that represent the target color range.
- Digital references with caution: Screens vary, so digital references should support, not replace, physical standards.
- Define acceptable range: Instead of one exact color, define a light and dark limit panel, especially for natural species like acacia or walnut.
2. Confirm Material and Construction Choices
Color stability depends heavily on structure. For example:
- For extremely uniform dark walnut color, consider walnut veneer on MDF rather than solid mixed walnut.
- For budget pine boxes requiring a very even mid-tone stain, consider whether MDF veneer is more realistic for the target price and color expectations.
Working with a supplier that operates as a Wooden Products Factory in China with multiple material routes allows you to discuss these trade-offs openly.
3. Specify Inspection and Tolerance Expectations
- Within one piece: Clarify whether variation between panels on a single product (for example, box lid vs. front panel) is acceptable.
- Within one carton: Decide whether all pieces in the same inner carton must be visually matched for tone.
- Between batches or reorders: Agree whether future orders must match the original master panel, and to what tolerance.
Documenting these expectations in POs and QC checklists reduces grey areas during third-party inspection.
4. Align on Packaging and Damage Control
Even perfect color control in production can be compromised if products rub together or are exposed to moisture during shipping.
- Protective packaging: Individual polybags, tissue wrapping, or paper sleeves prevent abrasion that could change sheen and perceived color on edges.
- Export carton planning: Use suitable inner cartons, dividers and padding to keep finished surfaces from touching each other.
- Carton drop-test thinking: Plan packaging so that normal handling or drop tests do not cause corner damage that exposes raw wood and visible color differences.
When discussing export packaging, link it directly to color and surface protection, not only to breakage risk.

Balancing Color Consistency with MOQ, Price and Lead Time
Color control always interacts with MOQ, cost and timing. Understanding these trade-offs helps buyers set realistic project frameworks.
1. MOQs and Color Control
- Dedicated finishing runs: For small MOQs, the factory may share finishing lines with other colors or products, increasing the risk of slight differences. Larger batches allow more stable setup and better color consistency.
- Reserved materials: For ongoing orders, planning MOQs allows the factory to reserve similar wood lots and veneers for your brand, reducing batch-to-batch variation.
2. Price Structure and Finish Complexity
- Simple vs. layered systems: A simple one-coat stain and clear finish is economical but may not mask natural variation. Adding a sealer or pre-toning step improves uniformity but adds cost.
- Material substitution: Sometimes switching from solid to veneer or from high-variation wood to a more uniform species can reduce finishing complexity and cost while improving consistency.
Transparent discussions around cost versus uniformity are important. For example, a budget pine gift box line may allow more variation than a premium walnut jewelry collection.
3. Lead Time Impact
- Sampling iterations: Achieving fine-tuned color often requires two or more sample rounds, especially for new designs or new materials.
- Extra in-process checks: Strong color control means more in-process inspections and possible re-selection of out-of-range pieces, which can add days to the schedule.
- Reorder planning: When lead time allows, the factory can align new material lots and finishing conditions more precisely with previous orders.
For time-sensitive launches or seasonal projects, agreeing on a slightly wider but clearly defined color tolerance can help keep timelines under control.
Conclusion: Building a Repeatable Color System with Your OEM/ODM Partner
Preventing color variation in stained wooden products is not a single action; it is a complete system that starts with choosing the right material, continues through moisture and sanding control, and depends heavily on disciplined stain preparation, application and inspection.
For importers, wholesalers, brand owners and Amazon sellers, the most practical approach is to work with a factory that can:
- Offer structured material options (acacia, pine, paulownia, bamboo, walnut, MDF veneer and plywood veneer) based on your color and price targets.
- Develop master color panels on the correct substrate and manage them carefully across sampling and production.
- Control moisture, sanding, stain mixing and topcoating with clear SOPs and documented checkpoints.
- Integrate color control into logo application, hardware fitting and export packaging to protect the final appearance.
Chic Homeware positions itself as an OEM/ODM partner for custom wooden boxes, organizers, trays, kitchen storage and gift packaging, combining flexible material routes with process-focused finishing control. Whether you are defining a new private label line or stabilizing color on repeat orders, we can work with you on sampling, logo options, structural optimization and packing solutions that support consistent color from the first carton to the last.
If you are planning your next project and want to reduce color-related claims and inspection risks, you can review some of our project capabilities as a Custom Wooden Boxes supplier, then share your brief, target color and material preferences with our team. For technical discussions on stain systems, moisture control, export packing and long-term color consistency, please Contact Chic Homeware to start a detailed OEM/ODM conversation.